Wednesday 30 July 2014

Project One - Colours - Feedback and Photos - Part Two

After a bit of break, I'm back with the conclusion to this project.
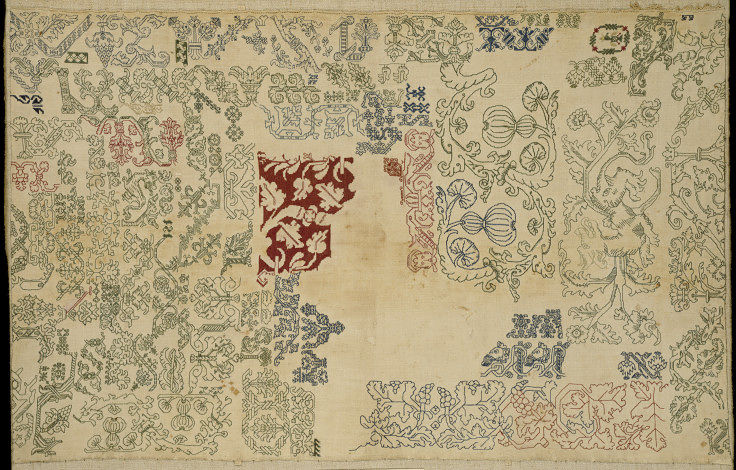
Where this project really got interesting was the French knot embroidery. Seurat was mentioned as a source for this project, and accordingly, I looked him up. As he's - I think! - a Neo-Impressionist, he was never too close to any of the artists on my radar, and therefore I didn't often come across his paintings often. I knew of the technique he most famously used, of course, but pointillism always seemed a little... well, gimmicky. I've changed my mind now, though! I started off my sampler with a few blocks of red and blue knots of different sizes. Most of the sampler was made with a double twist over the needle, for a slightly more raised knot. Then I combined the red and blue in various shades, then with green, then I went back to Seurat. I found a picture that was just the right scale, and a nice detail at that. It had a very wide range of colours, so after a trip out to expand my stitching palette, I got to work on the central image, a (very slightly warped) portrait of a man in the style of Seurat.
Here's the sampler:


And here's a side by side with the original:


It was a very fun project, albeit a hugely time consuming one!
Looking at the side by side, I didn't get the proportions quite right, and I've perhaps put a little too much emphasis on the blue in the picture, but as I've said before, the blue side of the spectrum is the side I favour! Just a few details on the manufacture: it was made almost entirely with the double twist knots, except for the face, which had single twists. It was on some plain white linen, and is deliberately densely packed across the frame aside from the face, where, like the painting, the 'canvas' shows through. I hadn't intended for this project to take quite so long, I'm afraid, but when I saw the potential for a great portfolio piece in a reworking of a classic, I had to make sure I did it right, without any short-cuts.The folder asked me to do two samplers that tried out combinations of bold and of pastel colours. I did keep these exercises as separate stages, but as you can see, they are part of the same sampler, evening out the colour balance in the hoop.

Just to answer a couple of the set folder questions:
Having done a good deal of painting recently, I felt I was able to mix and match colours easily and accurately. I think that I used colour pretty expressively - my project that dealt with a chosen emotion and the colours I associated with that emotion was, I felt, pretty successful. I chose 'uncertainty' and painted a series on it as instructed, using a few different sources. I pasted it into my main sketchbook, and labelled accordingly. I actually used oils for the painting exercises, so couldn't comment on whether I preferred watercolour or gouache paints in this context. It is my favourite painting medium, and the one I am most comfortable blending. I hope I'm being no trouble! Lastly, I would like to say how difficult it is to compare the exercises of painting and of stitching. I feel as though I wouldn't have thought much about how a colour can, on it's own, convey a state of mind without the painting exercises. Being far more of a draftsman-type painter than an expressive one when I was painting a lot, I wouldn't really have considered it beyond the significance everyone associates with certain colours - red with anger, blue with serenity, white for purity, etc. However, a more concrete understanding of the effect of colour came to me when I was stitching the Seurat sampler. My favourite part of the painting was the transition into shadows, using the different grades of blue. I think I'll have to be far more open-minded about the colour-utilising techniques pursued by that movement, the Impressionists. I may not like their style, but it's true that they handle colour brilliantly. 

Thursday 17 July 2014

Knitted Cape, Part Two.


I've cut out my cape, re-pinning to ensure I've got the same tension all around as I go. I've learnt a lot about the process of knitting through this project. I've knitted lace before, as you've seen, but never with so many stitches to handle. Through about 150 rows, I've had up to 1280 stitches per row. Next I'll be sewing the pattern to the velvet, removing the pins one at a time, and then it'll be time to put it on the model.


Please excuse the background! I'm very pleased with this conclusion to the project, although the central Tudor Rose motif is no longer visible in the folds. When I've saved up, I'll be heading back online for some faux fur to make a proper edging. I'll be posting the finished item later on.


Saturday 12 July 2014

Today, I finished a big project!

Recently, I bought a pattern for a fine christening shawl. I've been knitting away at it on and off for a while, using much larger than recommended equipment. Today, I finished it. You'll notice that it has no centre, and that the petal of the central flower at the top has a column of loose threads in it. That's deliberate. I modified the (twisting) pattern, so as to leave a row of extra long, unknitted threads that I could later cut down after stitching the piece down onto the black velvet you see here. Then it could be opened out and - wow! A circular cape! In this photo, I've pinned the piece to the heavy velvet. I couldn't get any velvet wide enough for the job, so did some neat seaming and joined two 54" x 80" pieces together. You'll see the dinner plate for scale in the centre of the knitting.

I'm going to leave it tacked down (attached through the velvet to my bedroom carpet!) for a couple of days, then cut it out.

Monday 7 July 2014

Project One - Colours - Feedback and Photos

Having completed my module on painting, I've talked about colour and colour science a great deal recently. When I was working for my painting, I wrote a very long essay on Chevreul, the French chemist who wrote a couple of books on 'colour contrasts', creating plenty of diagrams and comparisons as I went along. It was quite an interesting little project, but it did make me realise a few things. Some general, probably unscientific, and opinionated talk follows:
I've found in the past that the rules governing a colour wheel aren't applicable to every case. Personally, I prefer a more instinctive approach to colour, involving context, emotional response and connotation. The idea of the phrase, 'complimentary colours' is that these colours, being opposite to one another on the colour wheel, should work together particularly well. I've never really found that myself, and I'll show you why. Take red and green as examples. They occur together frequently in nature (red roses on green stems, Boston ivy in autumn, plenty of birds), and yet, if you put together similar shades, they look strangely gaudy. Yet put another colour closer on the wheel with one of them, and they look much less offensive. As a very, very simple demo, let me put this up with polka-dots. For reference, here's the colour wheel I sampled from.


The red? Well, that's frankly alarming. One of the phenomena that Chevreul observed in his work on complementaries was the effect of 'halos' around colours that, if paired correctly, would make some 'pop', like red on green here, and 'sink', like blue on green. Basically, if you pair a colour with it's complementary, it brings out both colours. Put red and green together, and the red is a brighter red, while the green is a brighter green. It's an interesting effect, and one which can be used to great effect when treated properly. Of course, what shade you choose is very important. Take this chart of red and green in varying shades, with the amount of saturation versus black at the top.


Now take a look at this sampler, showing the extent to which the colours enhance each other according to how much 'pure' colour is contained in each combination. The brighter, or purer, the colour, the more the smaller blocks 'pop' out from the background. The lighter combination is very thinly outlined in a darker shade of red or green - it's hard to make out - but the darkest combination is outlined in a very light green halo.


So, if colours are enhanced by juxtaposition with their complementaries, why not use these pairings more often? Well, at this point, I'll also explain a little about the connotations of complementaries. Putting red and green together makes for a strangely dated looking composition in interiors or a violent clash in abstract painting, but - combine it with white, and suddenly, it's a whole other cosy world: it's the three colours of Christmas.


 You'll note that here, I've toned down the brightness of the colours in accordance with my saturation chart, seen above. As I say, that's another factor to consider when picking a colour. If I made this sampler with crimson red and lime green, for me, it would tend to look cheap, especially if used in conjunction in large, uninterrupted blocks, such as part of an advert or display. That effect is furthered by using the complementary of a background colour as text. Red on green, or green on red, text is near unreadable because of the halos overlapping! So, taking an instinctive view on colour - and this is only my personal preference - I tend more towards the blue side of the spectrum, and like quite dark and watery colours best. Here is another sampler:

On the left, the primary colours. This triangle certainly stands out, and has a feel to it of three main tones - bright light in yellow, a mid-tone in red, and a shaded section in blue. The centre triangle is made up of the three main colours from the 'blue half' of the wheel - it feels very flat, without any real change in tone between green and purple. By adjusting the colours 'instinctively', I ended up with a paler triangle, seen on the left, in which all three colours have been brought closer together in tone. It certainly doesn't stand out as much as the first triangle, but it is 'easier on the eyes'. Of course, It's very different using blocks of colour in juxtaposition to using them in varying shades in a picture. As I've shown, putting red and green together in bright blocks doesn't necessarily improve them. These are only my primary thoughts on the subject, and as I had a good deal of fun with the rest of the section, I don't want to give the impression that I have in any way approached it with a closed mind.

The section of this project on understanding colour that I most enjoyed was, naturally, the embroidered demonstration of the colour principles. Here is a picture from the first exercise of three, aka 'stage 5'. Please excuse the unused part of the fabric at the top of the frame - a foot is attached there!


This project was a lot of fun, and all the more so for the way that using varied shades of my primary colours, blue and red, meant that they worked together to produce different effects close-up and far-out! I think that while the seed stitch was the most pleasing plain stitch, the way that the sampler seen at the very top left not only used up a load of my leftover threads, but created bands of blue, red, and purple was pretty special. It might look nice applied to some chiné silk patterns, as were popular in the 18th century on fabrics such as this one. Before I give my verdict on my work from this section, there are a couple more stitching exercises I'm dying to get going on, so I'll return in part two of this post.


Tuesday 1 July 2014

Inspiration from the Library (Part Two)

Aside from prints, I've been looking at a little collection of books on the subject of samplers.
Samplers and Tapestry Embroideries, by Marcus B. Huish, (published 1913, this edition 1990); the V&A's Samplers, by Donald King, 1960; and Samplers, Five Centuries of a Gentle Craft by Anne Sebba, 1979. All three have been interesting works, and, though I haven't been able to read them cover-to-cover just yet, the title given to the third volume especially peaked my interest. I've been wondering lately about doing a project that involves elements of samplers. I was fortunate enough to win an auction on two large tapestry frames recently, at 60cm square of stitching space, and am quite keen to adapt them to work as a kind of manual loom. I've also been given a good few kilometres of Aran wool, and am hoping to make a large scale project by combining the two - perhaps a throw, or a bedcover. This wool is very thick, and I don't think it would take an unreasonable amount of time to make nine frame-fuls of wool, thereby learning about the weaving technique, and practice some drawn-thread embroidery, sampler-like, across it's width, before sewing it together and edging it. It was partly with this outlandish idea in mind that I bookmarked some of my favourite (though, I'm sure, far too intricate for this project) pieces to work from, should an exercise involving samplers arise. Again, there are a few examples from the V&A, and some others that are frustratingly anonymous, due to the vague publishing style that existed in 1913. So I present a second little gallery - with notes to myself accompanying.

Firstly, this 16th century Italian sampler:


Filled with coloured blackwork stitching (blackwork, as most books won't tell you, and as I need to remember, being the style of stitching, and nothing at all to do with being made only in black. This sampler reminds me that even in such strict times as the years this must have been worked, all techniques had to be learnt. Yes, learnt from a very young age, so that finished products would rarely feature mistakes or visible un-pickings, but slowly, painstakingly, and untidily, learnt. I needn't think that because an artwork isn't on paper, I can't 'sketch' before trying an idea on a bigger scale.


Next, this (also Italian) sampler, probably from the first half of the 17th century- mostly cut and drawn work. If I remember rightly, the Italian method of cutwork, where threads are removed, leaving only a few to anchor a geometrical pattern, is called 'Punto in Aria' which means something like 'work in air' or 'stitches in air', or in one book that I'm rather sceptical about, 'something from nothing'. Perhaps that was the motto of the stitchers, rather than the name of the work. I've always tended to call it the more time-specific name, 'reticella', which is not a term applied to modern lace, unlike 'punto in aria'. This kind of lace is one of my favourites - because it's featured so prominently in the portraits of the time.


Take this portrait detail, for example. This is Elizabeth, Duchess of Kellie, By Paul (or Paulus) van Somer. It dates from 1619, roughly the same date as the sampler above. As you can see, it contains three different kinds of 'punto in aria'. The wide collar band, the edging for the smock(?), and one piece mounted on the black of her underclothing. A close-up of the lace sampler I've been talking about is available from the V&A, and is shown here alongside a close-up of this painting, and one taken from a scan from my own copy of Federico de Vinciolo's Les Singuliers et Nouveaux Pourtaicts, 1587 (obviously, my copy is a facsimile). Similar motifs are circled in red and green.


This similarity in dress across Europe is a testament to the power of the printing press! Here is a painting of an English lady, living in Scotland, painted by a Flemish (probably Dutch) painter, which shows a striking similarity to a sampler from Italy and a diagram from a book published in France.
I would love to be able to work a sampler like this one, but it's so difficult to judge the scale, or to know what scale to start learning a craft like this one. I've done a few samplers before in crochet cotton that incorporate elements of needle-lace, though only as fine as No. 20 cotton. Again, these are only notes, so there's no need to publish a finished idea here - unless I decide to do some lace-based prints for this section.


Thirdly, this late 17th century British sampler, which can be dated definitely to 1696. It's an interesting one, not only because the colours have kept so well, but because of the mixture of techniques. As you can see, it's partly the same Italian-style (now old-fashioned) cut and drawn work at the top, then some white-work, then a length of beautifully coloured naïve style embroidery. It's difficult to discern the stitches, however. My interest in this one is less in the more popular section of the piece, the surprisingly bold colours, more the evolution in reticella technique. Here's a close-up:


The geometric roots are still obvious, but in the 'wheels', particularly the centre one, the finished piece is far denser, less 'airy'. I'm still very impressed with the slanted stitching that fills that motif, though - the 'feathers' are very unusual. If I go down this road with printing, I think I'll be more likely to look at a piece like this one, and less like the second example in this post. I've never printed before, and I've got to go easy on myself! Perhaps I can print the main motifs, and paint in the 'bars' and 'picots'? More on this topic later.